Revisiting the NSB Di5
Between 1985 and 1987 the NSB bought 17 DB V60 switching locomotives. The V60 (later 260) was a large serie of diesel hydraulic locomotivies and to this date some are still in use in Germany. The NSB renumbered them Di5.861-877. They remained in use until the mid to late 1990's. All are scrapped.
 Di5.863 - Trondheim - July 12, 1993
Roco makes a nice model of the NSB Di5. In total there have been at least 3 production runs (catno. 43624 & 52532). The first run was pre-DCC and there is very little space for a decoder by I managed to install a small Lenz LE0512 in that run. The second & third run had a DCC connector, see
Di5 DCC install for details.
Recently ESU introduced an upgraded model of the DB class V60, and because of that an upgrade Loksound 5 sound file. That triggered the idea of installing a sound decoder in a Roco Di5. For the first installation we will use the same locomotive of the second run, as that was used on the original DCC install page.
DCC Sound Installation
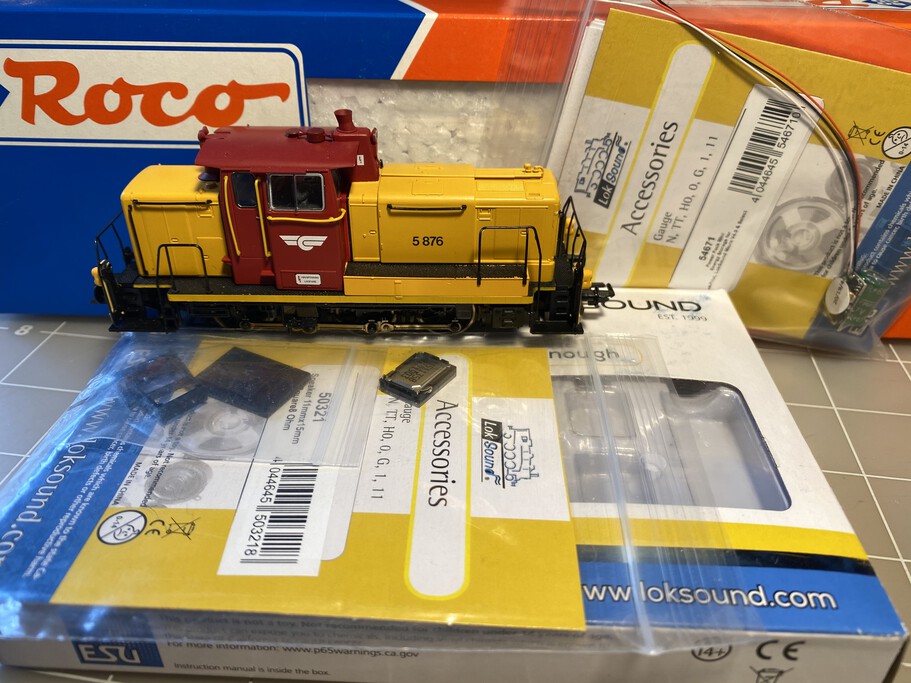
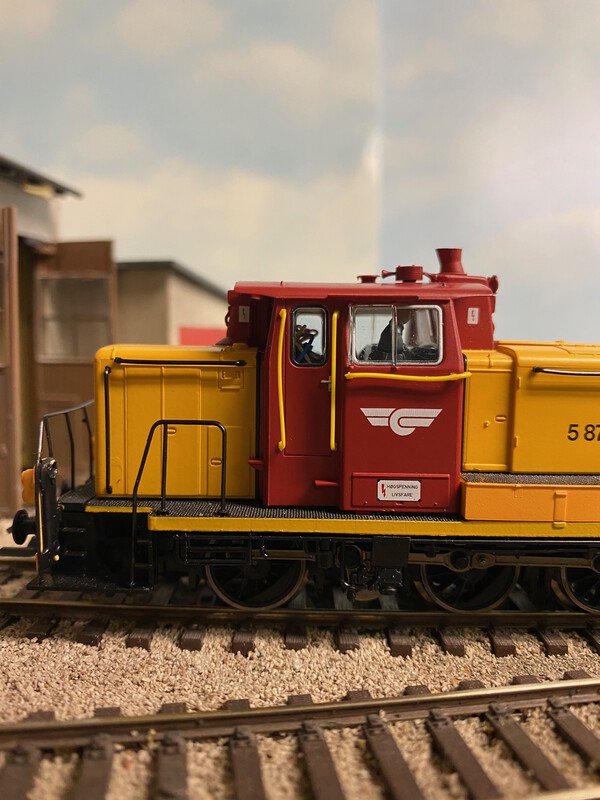
The second run Roco Di5, this Di5.876. The 876 is the former
DB 260 451-0 and was in service from November 1987 until june 1997. It was scrapped in Nov 1998.
The ESU parts for the installation:
- 50321 - Small speaker kit
- 54671 - Power Pack
- 58823 - Loksound 5 Micro DCC (with wires)
- S0031 - Loksound 5 V60 sound file
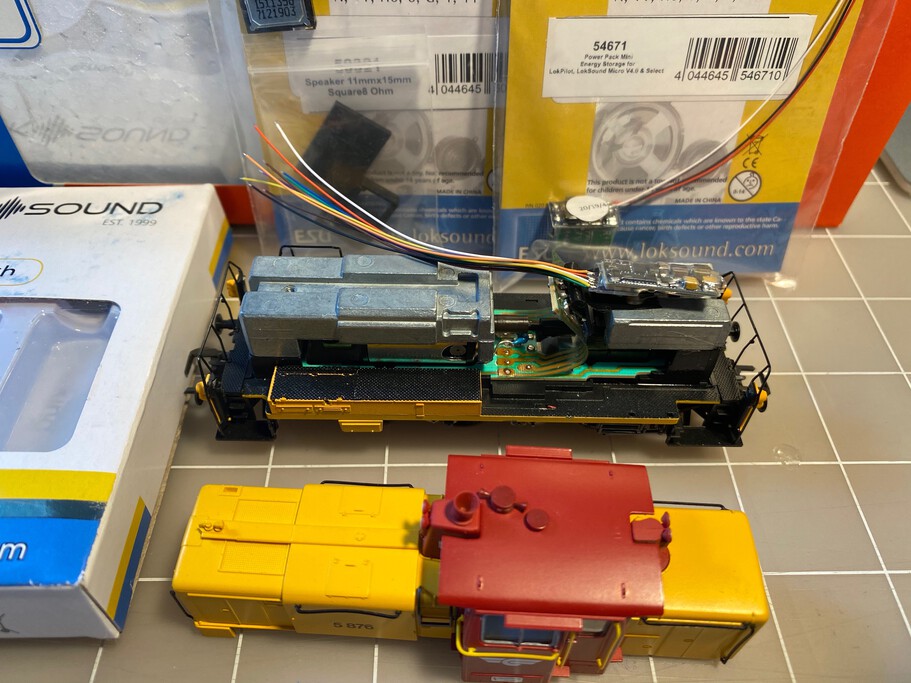
After the body is removed you see the space in the rear, which should be suffient to fit the Loksound 5 Micro. The weight in this place has to be removed for a regular DCC install and obviously won't be there for this install either. The normal NEM652 8 pin connector is visible as well.
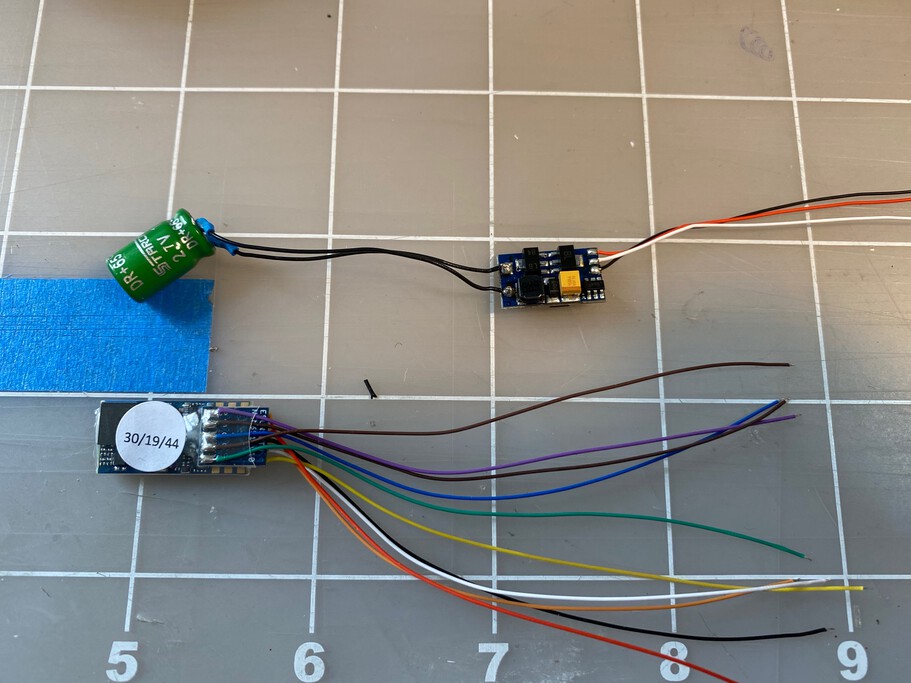
Test fitting of all the parts. The idea is to put the decoder in the rear compartiment. Put the speaker and the Power Pack capacitor under the cab interior. To make this possible we have to separate the capacitor for its board.
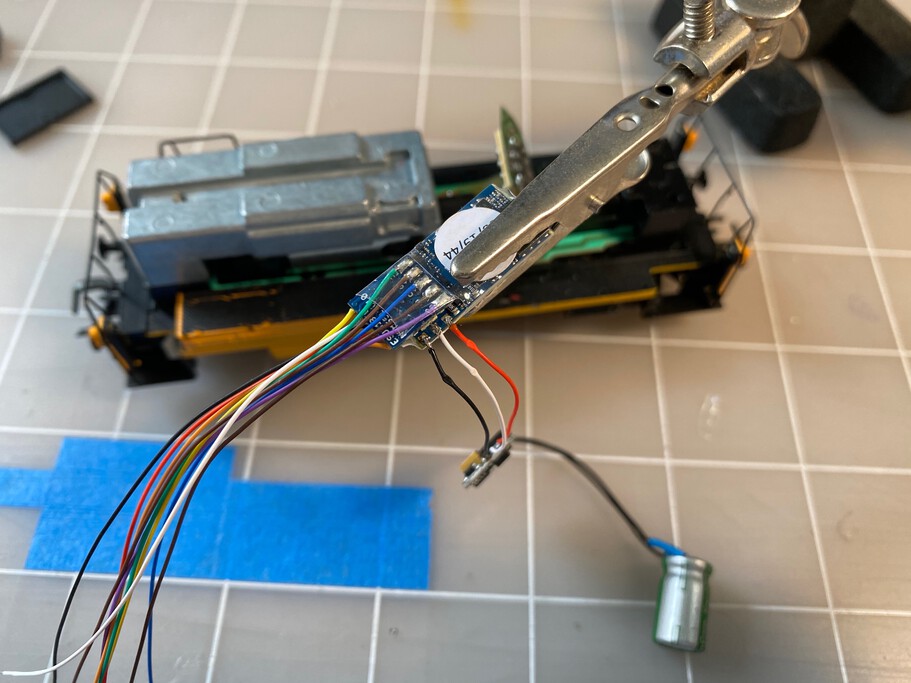
The capacitor has been attached to the small board with wires. The decoder has a regular NEXT18 connector with a small adapter board with wires.
The Power Pack has been soldered to the decoder. The decoder wires are soldered to a NEM652 connector so we can re-use the existing DCC plug in the locomotive. This also allows for making small wire leads from the decoder to the connector.
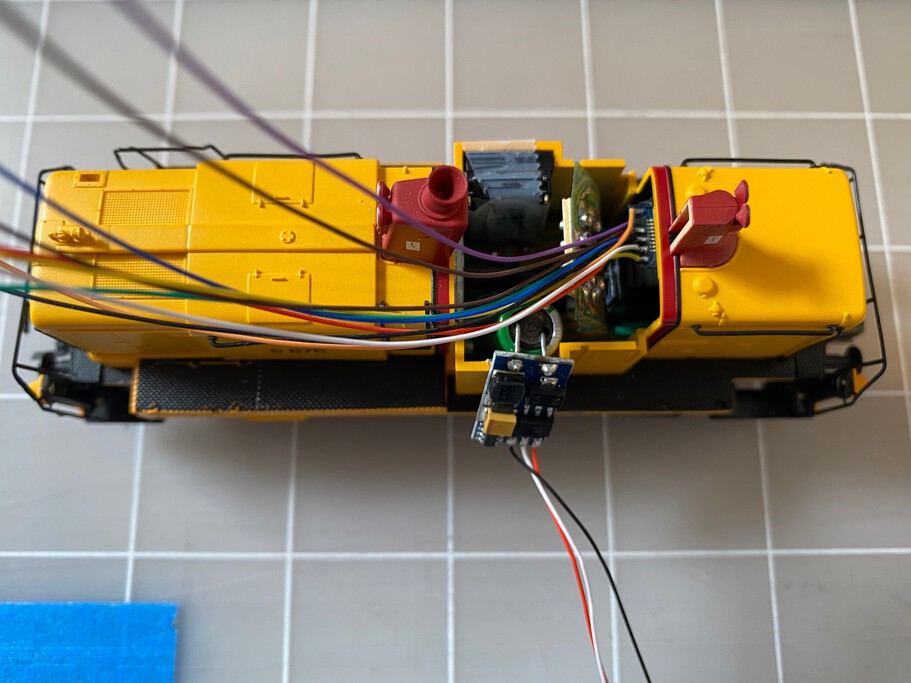
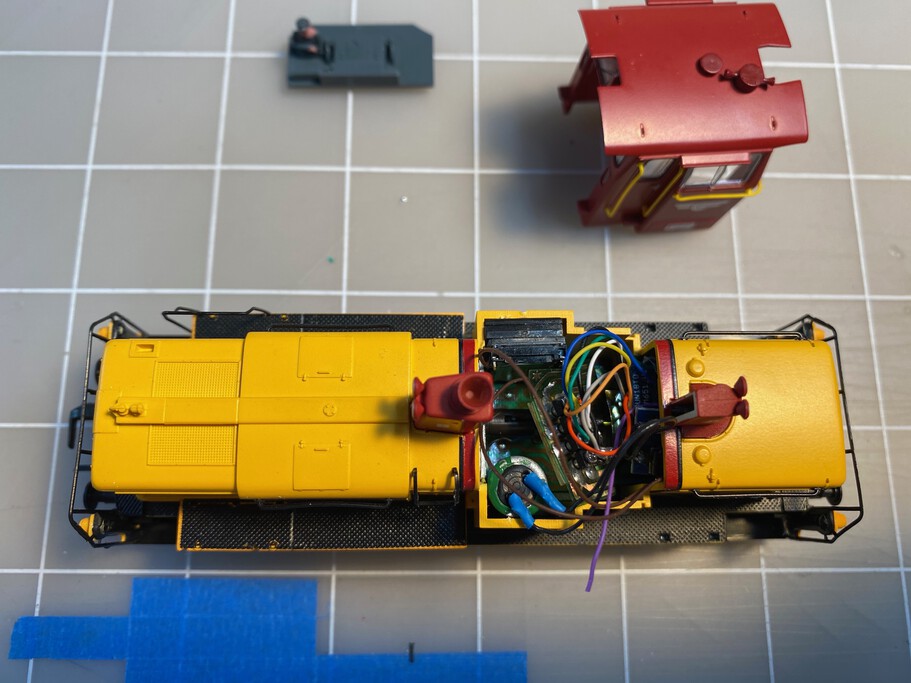
All the wiring is done. The decoder is being tucked away. Clearly visible are the speaker and the capacitor. The decoder is plugged into the existing connector on the Roco PCB board. I used a dummy decoder plug that I wired up.
The complete install. The speaker is now placed and the capacitor as well. Both are glued against the inside of the body. The small interior component (top left), can be placed on top of the speaker and capacitor.
Install complete and the Di5 is ready for service. Because of the space available, no extra parts are visible through the cab windows, except for some small wires but that is the same for the regular DCC install.
Created: 2020-05-03. Update: 2020-05-03